
Even though links between personal traits and music haven’t been fully explored yet, results of some studies might shock you… What a click bait intro that was ey? However… I don’t think it is a surprise at all. I think there are a bunch of links between personal traits and music. Here are a few examples:
POP
The study showed that those who said their favourite genre was pop tended to be extroverted with high self-esteem. They were also revealed as hardworking, honest, and conventional but more uneasy and less creative.
Rock and heavy metal
To outsiders, metalheads and hard rock fans can look aggressive and intimidating with battle jackets, dark clothing, and tattoos. But the study found fans of slamming riffs to be gentle, introverted, and creative with low self-esteem. To metalheads, this probably comes as no surprise – they often look like the toughest in the room but are softest at their core.
Jazz, blues, and soul
Another group of fans who were generally found to be comfortable in themselves, fans of jazz, blues, and soul tended to be extroverted and intelligent with high self-esteem. They were also deemed creative and at ease, which we think makes sense. With some of the smoothest chords and caramel vocals, we’d feel pretty at ease too.
More information about this study can be found here.
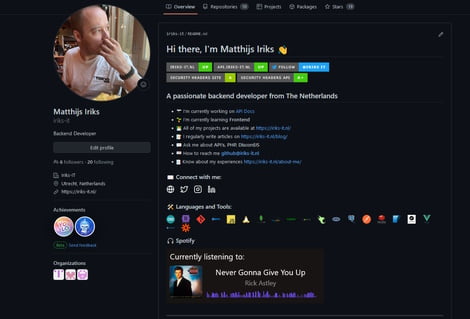
But music can say a lot about you, and their for is in my eyes an important piece of information. One, I think, worthy of sharing on a profile page like GitHub! In this tutorial I’ll show you how to set it up, and how to customize it to how you want!
When you are playing music, it will display the current song. if you are not playing music, it will pick a random song form the 10 last played tracks. This however, all can be changed in the config and I will show you how. Mind you, there are heaps of repos out there that you could use, they all work the same… I personally prefer the look of this one the most. plus it also has a great SetUp.md file which was really handy!
How to set it up :
Step 1
Go to this repository and fork it.
Step 2
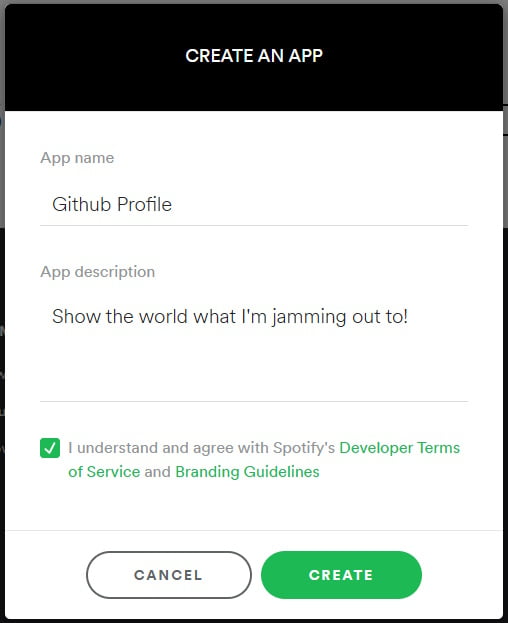
Go to the Spotify for Developers page, login, and create a new application here. Give it a nice catchy name, description & make sure you agree to the Terms of Service.
Step 3
Get your flavor of copy-pasta tool ready! Today’s flavor for me is Notepad++. We will be needing this a lot, so fire it up!
Step 4
Copy the Client ID into your notepad, then click “Show Client Secret” and copy this to your notepad too!

Step 5
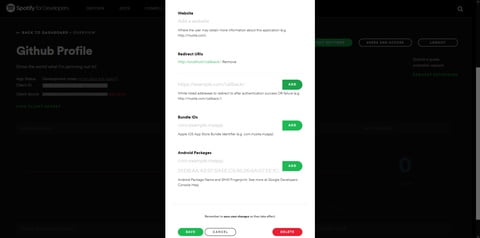
Go to “Edit Settings” and under “Redirect URIs” add the following URL : http:/localhost/callback/ then scroll down and hit save!
Step 6
Remember that handy dandy copy pasta tool you picked out at step 3? You’ll need it now!
Copy this URL : https://accounts.spotify.com/authorize?client_id={SPOTIFY_CLIENT_ID}&response_type=code&scope=user-read-currently-playing,user-read-recently-played&redirect_uri=http://localhost/callback/
Make sure you change {SPOTIFY_CLIENT_ID} to the Client ID you grabbed from Step 4, then visit the URL in your browser
Step 7
Seeing an error? Great news!
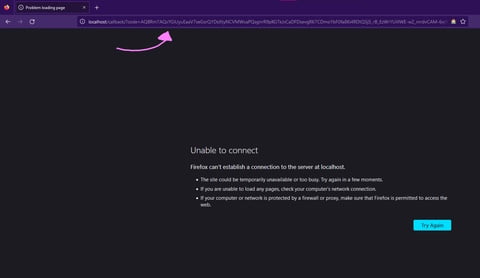
As shown in the image here, this is fine! notice the parameters you received. We need to save that code bit to our handy notes! We will need this to create our refresh token ( trust me, the hardest part is almost done… bare with me here, we can do this! )
Step 8
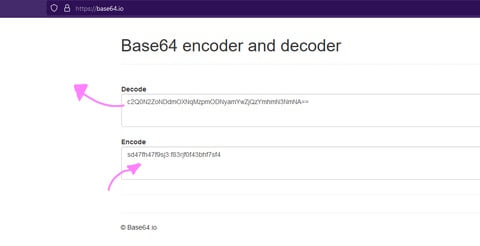
We need to create a string combining {SPOTIFY_CLIENT_ID}:{SPOTIFY_CLIENT_SECRET}, As an example sd47fh47f9sj3:f83rjf0f43bhf7sf4 and encode this into Base64, i personally prefer using base64.io for this. Slap the decoded bit into… You guessed it… In them handy dandy notes!
Step 9
Next up, we are going to knock on Spotify’s API server to receive our refresh token. to do this, we will be using cURL. I don’t recommend using online tools for this, but instead, use a terminal like Powershell or GitBash. Afterall, its using our credentials to create a refresh token. With this, a tool can endlessly create tokens to access the endpoints with the right scope. in My example, i’ll be using GitBash, and with a test application that will be deleted before this post goes live, so don’t worry about me 😉

Make sure you save the refresh token in, you guessed it… them handy dandy notes once again!
Step 10
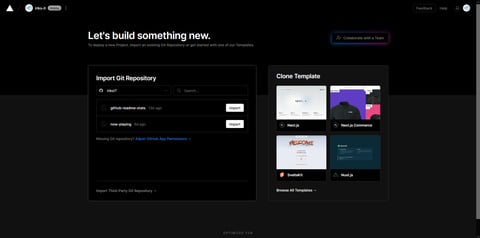
You still with me? Good! This, was the hardest part! Now we got all the parts we need. Next up… Vercel You need to register here. Once this is done, you can import a project! Once logged in, connect your GitHub and grant Vercel access to your repo’s, then import the repo what you forked in Step 1
Step 11
When configuring the project you will create 3 variables, they will be named SPOTIFY_REFRESH_TOKEN, SPOTIFY_CLIENT_ID & SPOTIFY_SECRET_ID and they will contain the corresponding information we have gathered in our handy dandy notes! and… once again, the credentials in the image below will be deleted and useless before this post goes live 😉

Step 12
Hit deploy, and magic should happen! once your Vercel instance is running, all you need to do now is the following. Copy the Vercel instance URL and put that in your handy dandy notes! you will need them in the next and final step! it’s time to update your GitHub profile readme.
Step 13
Copy the following code, and head over to your GitHub profile readme.
[]({SPOTIFY_PROFILE_LINK})
There are 2 things you need to replace
1 – {VERCEL_INSTANCE_URL} needs to be the last thing you pasted into your notes.
2 – {SPOTIFY_PROFILE_LINK} needs to be your Spotify user id, this you can find by going into Spotify, opening your profile, hit the three dots, click share profile, and paste this url here.
Final words
And done… That’s it!
🎉 You did it!
Hopefully you found this first post interesting! If you want to leave a comment, feel free to do so. If you want to get in touch with me, be sure to use the contact form here

